How to Control an Arduino Uno with NodeJS
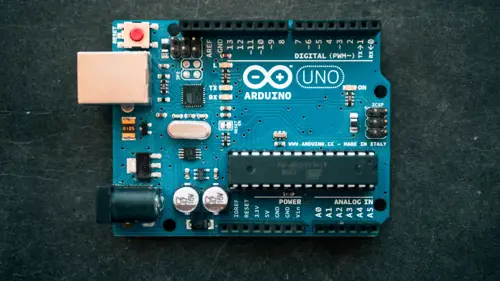
In this tutorial I’m going to show you how to drive an Arduino Uno using NodeJS. The Arduino Uno is a popular microcontroller board for hobbyists. You can control things wired to it like LEDs and motors. To program it you write code in an IDE and then upload the code to the board. The upload happens over a USB cable.
Usually the board is self-contained. Internal logic or input wired to the board controls the output. But you can upload a special “sketch” (file) called Firmata. That will allow you to control the board via a serial connection from a host. The host can be a PC, a Mac or even a Raspberry Pi*. One way to control it from a host is by using a special NodeJS module called johnny-five.
*If you do plan to run an Arduino from a Raspberry Pi, check the power requirements before you cause a meltdown. See the References section at the end of this tutorial. The author of this tutorial assumes no risk.
The instructions are for a Mac. They should run on most Linux boxes – including the Raspberry Pi. Windows users may need to look at tools like cygwin.
What You Will Need
- An Arduino Uno board with USB cable
- The Arduino IDE installed on the host computer (download it here)
- NodeJS and npm installed on the host (it may already be installed)
Create the NodeJS Program
- Open up a Terminal window
- Create a folder: mkdir arduino101
- Change to it: cd arduino101
- Type: npm init
- Just hit enter at all the prompts to accept the defaults
- Type: npm install johnny-five --save (two dashes before ‘save’)
- Type: npm install express –-save (again, two dashes)
- Create a file called index.js using your favorite text editor
- Add this code and save the file:
Code Description
The code above does the following:
- References required modules and sets variables
- Defines a function using the johnny-five modules board object for processing a ready event from the Arduino board
- Defines a function using the express module to process HTTP GET requests in the format of /led/mode (where mode can be: { on, off, blink or stop })
- Modes are mapped via a switch statement to functions on the led
- Uses the express module to listen for HTTP requests on the port (in this case 8000)
Why LED 13?
You may have noticed that the code refers to an LED on pin #13. Is this something you need to wire up? No. Most Arduino boards come with an LED on the board already wired to pin #13. So you won’t need anything more than the board and it’s USB cable for this tutorial.
Run the Program on the Arduino Uno
- Hook the Arduino Uno up to your Mac via the USB cable
- Launch the Arduino IDE
- Set the serial port in the IDE: Tools > Port > *(Arduino)
- Select: File > Examples > Firmata > Standard Firmata
- Select: Sketch > Upload (there’s also a button on the UI to do it)
- At the command line type: node index.js
- Leave that terminal window open and open up another one.
In the new terminal window try the following commands:
curl -X GET ‘http://localhost:8000/led/on’
curl -X GET ‘http://localhost:8000/led/off’
curl -X GET ‘http://localhost:8000/led/blink’
curl -X GET ‘http://localhost:8000/led/stop’
If curl doesn’t work on your system try substituting wget.
If you still can’t get it to work, try typing the URL’s into a browser (works best with Chrome).
When you type a command, look at the board. The onboard LED should respond to your command either by turning on, off, or blinking.
Note: after a /blink command you have to call /stop in order for /on or /off to work again.
To stop the node server: in the original terminal window press Ctrl-C twice.
Console Output
On startup, look for a board ready message in the console. Check your USB connection if you don’t see it.
Valid requests should log an “OK” message to the console. Invalid requests (such as /led/foo) should log an error.
Remote Control
What we’ve done here is define a Web service to control an Arduino board through a host running a NodeJS server. You could call the Web services through the browser or wrap them in HTML. You could even build mobile phone apps to call the Web services behind the scenes.
Alternatives
You don’t have to wire an Arduino to a host to drive it via HTTP. There are ethernet and wireless “shields” (add-on boards) that you can use. It all depends on what type of device you plan to build.
If you’d like to control a few micro-servos, see my follow-up article:
If you’d like to try johnny-five directly on a Raspberry Pi see this link:

