
How to blink an ELEGOO UNO R3 onboard LED (Mac, 7 Steps)
In this article I show you how to blink the onboard LED of an ELEGOO UNO R3 board. These instructions were written using a Mac, but can easily be adapted for Windows.
To blink the onboard LED of an ELEGOO UNO R3 board you can program it like an Arduino board. It registers with the Arduino IDE as an ordinary UNO R3. Just plug it in and upload the basic blink example.
In the steps below, I will show you how to do that.
Where to buy
For this article I used the following hardware:
- 2020 Apple MacBook Air with Apple M1 Chip (13-inch, 8GB RAM, 256GB SSD Storage) - Gold (Amazon Affiliate link)
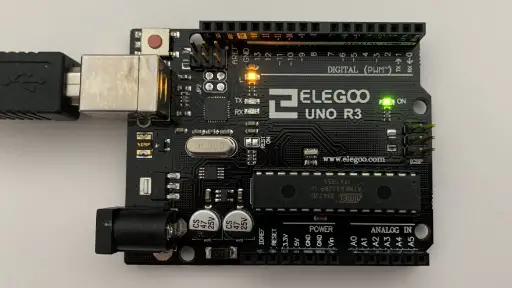
- ELEGOO UNO R3 Board ATmega328P ATMEGA16U2 with USB Cable Compatible with Arduino IDE Projects, RoHS Compliant (Amazon Affiliate link)
The board that I bought has a printer-type USB 2.0 B connection. The board should come with a USB cable. But my Mac only has USB-C ports. So to connect I used this cable (Amazon Affiliate link):
Step 1. Plug the ELEGOO UNO R3 into your Mac
The first thing that you need to do is plug the ELEGOO UNO R3 board into your Mac. The board will be powered by the USB cable for this example. So you won't need an external power supply.
- Plug the USB cable into your laptop
- Plug the USB cable into your ELEGOO UNO R3 board
- Confirm the power LED on the board is on (on my board it is a green LED)
Step 2. Download the Arduino IDE
This article was tested using the Arduino IDE version 1.8.13.
- Browse to: https://www.arduino.cc/en/Main/Software
- Download the IDE for your operating system
Mac Instructions
- Double click the *.zip file to extract the application
- Copy the Arduino app to the Applications folder
Step 3: Configure the Arduino IDE for the board
- Start the Arduino IDE
Select the board
- Select Tools > Board: *
- Select Arduino Uno
Select the port
- Select Tools > Port: *
- Select /dev/cu.usbmodem101 (Arduino Uno)
Step 4: Open the blink example
- Select: File > Examples > 01.Basic > Blink
The code should look something like this (I've trimmed the header comments for brevity):
/*
  Blink

  This example code is in the public domain.

  http://www.arduino.cc/en/Tutorial/Blink
*/

// the setup function runs once when you press reset or power the board
void setup() {
  // initialize digital pin LED_BUILTIN as an output.
  pinMode(LED_BUILTIN, OUTPUT);
}

// the loop function runs over and over again forever
void loop() {
  digitalWrite(LED_BUILTIN, HIGH);   // turn the LED on (HIGH is the voltage level)
  delay(1000);                       // wait for a second
  digitalWrite(LED_BUILTIN, LOW);    // turn the LED off by making the voltage LOW
  delay(1000);                       // wait for a second
}
Code description
- The setup function sets up the onboard LED as an output pin, so it can be turned on and off
- The loop repeatedly turns the LED on and off by toggling the voltage level between HIGH and LOW
- Delays are used to control how quickly the LED turns on and off
Step 5: Upload the code to the ELEGOO UNO R3
- Click the Upload button (the right pointing arrow in the IDE tool bar)
Step 6: Verify it works
- Verify that you see the onboard LED blinking on and off
On my board the LED is yellow.
Step 7. Modify the file
You can experiment with this simple example by changing the delay values and uploading new code to the device. Make the delay different enough so that you can confirm that your changes are working.
But before you can do that you should save the file under a new name:
- Select File > Save As...
- Give it a new name (like BlinkR3)
- Click Save
Modify the delay
- Change the first delay value to 5000:
void loop() {
  digitalWrite(LED_BUILTIN, HIGH);   // turn the LED on (HIGH is the voltage level)
  delay(5000);                       // wait for 5 seconds
  digitalWrite(LED_BUILTIN, LOW);    // turn the LED off by making the voltage LOW
  delay(1000);                       // wait for a second
}
- Select File > Save
- Upload the new sketch to the board
- Notice that the LED stays on for 5 seconds now
Try changing both delay values and see what happens when you upload the changes.
Conclusion
In this article you learned how to:
- Connect an ELEGOO UNO R3 board to a Mac
- Download and install the Arduino IDE
- Configure the IDE to work with the board
- Upload an example blink sketch
- Save, modify and upload a new version of the example
Related articles
See my related articles, where I show how to blink the LED for other types of Arduino boards.
- How to blink an ESP32 onboard LED (Mac, 7 Steps)
- How to blink a D1 Mini onboard LED (Mac)
- How to blink a Seeeduino XIAO onboard LED (Mac, 7 Steps)
- Seeeduino Nano Grove Setup (Arduino Compatible)
References
- ELEGOO UNO R3 Board With USB Cable Compatible With Arduino IDE [1]