
Jetson Xavier NX Jupyter Setup (Docker)
This article covers setting up Jupyter and Machine Learning frameworks on a Jetson Xavier NX using Docker.
Step 1. Find an NGC container
Instead of installing Jupyter from scratch, you can download and run a Docker container that NVIDIA has already setup for you. The container also sets up TensorFlow, PyTorch, JupyterLab, scikit-learn, scipy, and Pandas pre-installed in a Python 3.6 environment. Everything you need to get started with machine learning!
What is NGC?
From the NVIDIA documentation:
NVIDIA GPU Cloud (NGC) is a GPU-accelerated cloud platform optimized for deep learning and scientific computing. In this release, NGC includes NGC containers, the NGC container registry, the NGC website, and platform software for running the deep learning containers. This document provides an overview of the NVIDIA GPU Cloud and how to use it.
What is an NGC container?
Again, from the NVIDIA documentation:
NGC Containers are designed to enable a software platform centered around minimal OS requirements, Docker and driver installation on the server or workstation, and provisioning of all application and SDK software in the NGC containers through the NGC container registry.
To find and install an NVIDIA container that will run Jupyter on your device, do the following:
- Browse to https://ngc.nvidia.com
- In the search bar, query for Jupyter
- Select the image titled Machine Learning for Jetson/L4T
Step 2. Pull the image
After following the previous step you should be looking at the page for the Docker image that contains Jupyter. It should list a pull command.
- Open up a Terminal window or ssh into your Jetson device
- Run the pull command (you may need to put sudo in front of it)
- Based on the version at the time of this writing, the pull command I used looks like this:
sudo docker pull nvcr.io/nvidia/l4t-ml:r32.4.2-py3
If the image has been updated, the versions numbers may be different. Be sure to use the path specified on the container page.
Step 3. Create a folder for your notebooks
Because this is a Docker image, any Jupyter notebooks that you create will vanish when you shutdown the container. So you need to create a local folder that you can map to the container by doing the following:
mkdir ~/notebooks
Note that if you have an NVMe SSD installed you could create a volume there instead.
Step 4. Run the image
- To run the image, use this command (note the volume mapping for the notebooks folder):
sudo docker run -it --rm -v $PWD/notebooks:/notebooks --runtime nvidia --network host nvcr.io/nvidia/l4t-ml:r32.4.2-py3
Again, if the image version has been changed, update the path to the container.
You should see a response like this:
allow 10 sec for JupyterLab to start @ http://localhost:8888 (password nvidia)
JupterLab logging location:  /var/log/jupyter.log  (inside the container)
root@jet3:/#
Please note that if you are trying to adapt these instructions for a Jetson Nano, you should be using the SD image from 2020-07-07 or later. Otherwise you may get an error from Docker.
Step 5. Browse to Jupyter
- Give the Jupyter server time to boot up
- Open a browser on a PC or laptop that is on the same network as the Jetson
- Browse to http://YOUR-HOSTNAME.local:8888/
- subsitute YOUR-HOSTNAME with your Jetson devices hostname
- The default password is nvidia
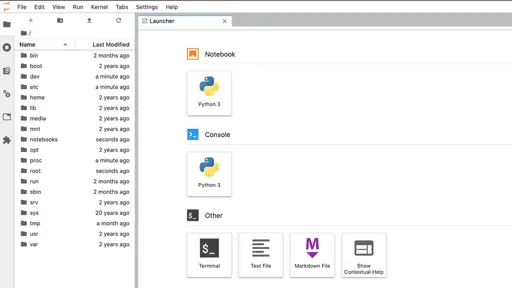
Step 6. Create a Hello World notebook
Create a new notebook
- In the Launcher window
- under Notebook
- click Python 3
Run a cell
- The notebook automatically defaults to a new code cell
- In the code cell, write some Python code:
print('Hello Jupyter!')
- Click the Run button in the tool bar
- It looks like a Play button / right pointing triangle
- The mouse over text says Run the selected cells and advance
- You should see the message printed below the cell
{% include google-article.html %}
Step 7. Save the notebook to the shared volume
Rename the notebook
By default the new notebook is titled Untitled.ipynb.
- Select from the main menu File / Rename Notebook...
- Change the name to GettingStarted.ipynb
If you don't do the next step, the notebook will vanish when you exit the container.
- Drag the notebook to the notebooks folder in the launcher
Step 8. Verify the notebook was saved
- Close the browser window
- In the Jetson terminal window for the running container (at the /# prompt) press Ctrl-D.
- Verify the notebook was saved in the notebooks folder
ls -ls ~/notebooks
Step 9. Verify the notebook can be loaded in a new session
- Restart the Jupyter server (see step above)
- Wait several seconds, then open Jupyter in a browser again (see step above)
- Browse to the notebooks folder in the browser
- Click on GettingStarted.ipynb
- Run the cell
Troubleshooting
403 Forbidden
If you restart Jupyter but don't refresh your browser you will get 403 Forbidden responses when trying to create notebooks, etc.
Refresh your browser, enter the password (default: nvidia) and try again.
Can't find notebook
Did you make sure that you saved it to the persisted volume folder (/notebooks) ?
Conclusion
In this article you learned how to:
- Find and install an NVIDIA container
- Run Jupyter in Docker
- Map a volume to persist your Jupyter notebooks
- Create, save, rename and move a Jupyter notebook