
Jetson Xavier NX NVMe SSD Setup
In this article I’m going to show you how to mount a
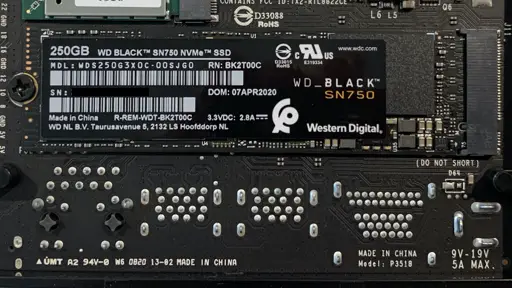
WD_Black SN750 250GB NVMe Internal Gaming SSD to a Jetson Xavier NX.
To order the parts for this article you can use my affiliate links:
- NVIDIA Jetson Xavier NX Developer Kit
- WD_Black SN750 250GB NVMe Internal Gaming SSD - Gen3 PCIe, M.2 2280, 3D NAND - WDS250G3X0C
- SanDisk 128GB Extreme microSDXC UHS-I Memory Card with Adapter
The steps below are based on steps provided by NVIDIA to setup the Jetson Cloud Native Demo. You can find a link to those steps in the reference section at the end of this article.
Step 1. Install the NVMe SSD
- Unplug the power and any other attached cables
- Flip the Jetson Xavier NX over
- Remove and save the screw that will hold the drive in place
- Gently insert the drive into the M.2 connector, keeping it as flat as possible
- Make sure the contacts are lined up and match the contacts on the board
- See the picture at the top of this article to check the orientation
- Gently slide and snap the drive into place until the screw hole lines up with the end of the board
- Screw the board into place
- Flip the board back over and power up the Jetson Xavier NX
Step 2. Open up a command line
To access the command line you can do the following:
- Perform an ssh login to access your Jetson Xavier NX
- If using the desktop, open up a terminal window
For this article I ssh’d into my Jetson, like this (if doing the same, replace the command with your user and host name):
ssh mitch@jet3.local
Step 3. Run the lsblk command
To see what storage devices you have on your system you can run the lsblk command.
Without going into too much detail, the command lists “block devices” - in simple terms it usually refers to storage devices, like hard drives and SSD drives.
To verify that the Jetson Xavier NX can see the NVMe SSD, run this command:
lsblk
If for some reason this fails, try putting sudo in front of the command (sudo lsblk…).
You should see the new drive listed in the results.
Look for nvme0n1 in the results, like this (results trimmed for brevity):
NAME         MAJ:MIN RM   SIZE RO TYPE MOUNTPOINT
...
nvme0n1      259:0    0 232.9G  0 disk
If you don't see anything like that, unplug the power and verify that the drive was installed properly.
{% include google-article.html %}
Step 4. Format the drive
To format the drive, run this command:
sudo mkfs.ext4 /dev/nvme0n1
Step 5. Save the full path to your home folder
Several commands to set things up require the full path to your home folder.
To determine what that is, do the following:
- switch to the root of your home folder
cd ~
- print working directory (pwd)
pwd
Because my user name on the Jetson Xavier NX is mitch this is what I get:
/home/mitch
In the examples below you will need to replace "YOUR-USERNAME" with your user name for the commands to work properly.
Step 6. Create a mount point for the drive
A mount point is a way to map (or mount) a device to a folder. If you are familiar with Windows, the way to do it is to map a new device to a drive letter (D:\, etc.).
Linux and UNIX operating systems don’t use drive letters. Instead they use folders mapped under a /mnt or other parent folder.
Since the NVIDIA example puts the folder under the users home folder, I'll stick to the way they do it.
To create a new mount point under the users home folder you must make a new subfolder like this (substitute YOUR-USERNAME):
sudo mkdir /home/YOUR-USERNAME/nvme
For this example I called the new subfolder nvme to be consistent with the NVIDIA example - you can call it whatever you want. Though keep it simple and avoid spaces, caps or special character.
Step 7. Mount the drive to the folder
Now that you have a new mount point setup, you can map the NVMe SSD to it.
Since the lsblk command showed that the device is seen as /dev/nvme0n1, the command should be (substituting YOUR-USERNAME):
sudo mount /dev/nvme0n1 /home/YOUR-USERNAME/nvme
{% include google-article.html %}
Step 8. Run the disk filesystem utility
Whenever you want to see how much space you have on your drives, run the df (disk filesystem) utility:
df -h
You should see a response like this (notice the new /dev/nvme0m1 drive):
Filesystem      Size  Used Avail Use% Mounted on
/dev/mmcblk0p1  117G   17G   96G  15% /
none            3.5G     0  3.5G   0% /dev
tmpfs           3.8G  4.0K  3.8G   1% /dev/shm
tmpfs           3.8G   22M  3.8G   1% /run
tmpfs           5.0M  4.0K  5.0M   1% /run/lock
tmpfs           3.8G     0  3.8G   0% /sys/fs/cgroup
/dev/nvme0n1    229G   61M  217G   1% /home/mitch/nvme
tmpfs           778M   12K  778M   1% /run/user/120
tmpfs           778M  132K  778M   1% /run/user/1000
Step 9. Automatic mounting on reboot
If you reboot or shutdown the Jetson, the NVMe SSD won’t be remounted when you restart it.
Using the vim editor, update /etc/fstab:
sudo vim /etc/fstab
Append this line to the bottom of the file and save it (substitute YOUR-USERNAME)
/dev/nvme0n1 /home/YOUR-USERNAME/nvme ext4 defaults 0 1
Then reboot the system:
sudo reboot
Step 10. Verify the drive is mounted:
After the Jetson Xavier NX has been rebooted, verify that you can still see the drive by running df again:
df -h
You should still see the NVMe drive listed (results trimmed for brevity):
Filesystem      Size  Used Avail Use% Mounted on
...
/dev/nvme0n1    229G   61M  217G   1% /home/mitch/nvme
Step 11. Create a swap file
Next, create a swap file on the NVMe by following these instructions:
- Turn off zram
cd /etc/systemd
sudo mv nvzramconfig.sh nvzramconfig.sh.orig
sudo reboot
- Create a swap file on the NVMe SSD (substitute YOUR-USERNAME):
sudo fallocate -l 32G /home/YOUR-USERNAME/nvme/swapfile
sudo chmod 600 /home/YOUR-USERNAME/nvme/swapfile
sudo mkswap /home/YOUR-USERNAME/nvme/swapfile
sudo swapon /home/YOUR-USERNAME/nvme/swapfile
sudo swapon -s
- Edit /etc/fstab:
sudo vim /etc/fstab
- Append this line so that the swap file will be automatically mounted after rebooting (substitute YOUR-USERNAME):
/home/YOUR-USERNAME/nvme/swapfile swap swap defaults 0 0
- Save the file and reboot.
Troubleshooting
Drive not found
If you are having trouble seeing the NVMe SSD drive, power everything down, disconnect all cables and try reseating the drive.
View the swap file
To confirm that the swap file is working, run this command:
swapon -s
You should see a response like this:
Filename                     Type  Size     Used  Priority
/home/mitch/nvme/swapfile    file  33554428 0       -1
Conclusion
In this article you learned how to:
- Install an NVMe SSD drive
- Mount an NVMe SSD drive
- Map an NVMe SSD drive to a folder
- Edit /etc/fstab
- Automatically mount an NVMe SSD drive when your Jetson Xavier NX is rebooted
- Create a swap file on an NVMe SSD
Related Articles
- Jetson Xavier NX Headless WiFi Setup
- Jetson Xavier NX Jupyter Setup (Docker)
- Jetson Resource Guide
- Headless Raspberry Pi 4 External SSD Setup (Samsung T5)
References
- Jetson Cloud Native Demo [1]