
Setup Pi Zero W Headless Wifi
This article covers setting up the Pi Zero W for headless SSH access over WiFi using a Mac. The Windows version of these instructions can be found here: Headless Pi Zero W Setup (Windows).
If you have an older Pi Zero 1.3, see my article Setup Pi Zero Wifi.
Step 1. Download a lite Raspbian image
These instructions are for a Raspbian Buster image that I downloaded from here:
https://www.raspberrypi.org/downloads/raspbian/
I'm using the lite image (no desktop) version 4.19 from February 13, 2020.
Step 2. Unzip the file
Once you download the file, unzip it and note the location of the *.img file.
cd ~/Downloads
unzip 2020-02-13-raspbian-buster-lite.zip
ls -ls *.img
Step 3. Plug a micro SD card into your Mac
Put a blank micro SD card into an adapter and plug it into your computer.
Open up a terminal window and type:
diskutil list
At the bottom of the output, you should get a result similar to this:
/dev/disk2 (internal, physical):
#: TYPE NAME              SIZE    IDENTIFIER
0: FDisk_partition_scheme *7.9 GB disk2
1: Windows_FAT_32 boot    66.1 MB disk2s1
2: Linux                   7.9 GB disk2s2
Assuming that your SD card is 8GB, you can tell that /dev/disk2 is the SD card. On your machine it may be different. Make sure you have the correct one before proceeding.
Step 4. Unmount the micro SD card
Before you can burn an image to the card, you needs to unmount it first, by issuing this command (assuming disk2!):
diskutil unmountDisk /dev/disk2
Step 5. Burn the image to the micro SD card
To burn the image to the SD card, run this command (adjusting for the location and filename of the image that you downloaded):
sudo dd bs=1m if=~/Downloads/2020-02-13-raspbian-buster-lite.img of=/dev/disk2
If you get an error that the volume is busy, make sure you ran the ummountDisk command first (see step above).
The command should take several minutes. You can press Ctrl-T to get a snapshot of the commands progress.
Once it's done you should see the new Raspbian boot volume when you execute this command:
ls -ls /Volumes/
Step 6. Enable ssh
For security reasons, ssh is no longer enabled by default. To enable it, run this command:
touch /Volumes/boot/ssh
Step 7. Add network info
Create a new empty file that will hold network info:
touch /Volumes/boot/wpa_supplicant.conf
Edit the file that you just created and paste this into it (adjusting for your ISO 3166 alpha-2 country code, network name and network password):
country=US
ctrl_interface=DIR=/var/run/wpa_supplicant GROUP=netdev
update_config=1

network={
    ssid="NETWORK-NAME"
    psk="NETWORK-PASSWORD"
}
Step 8. Eject the micro SD card
Issue an eject command:
diskutil eject /dev/disk2
The command won't physically eject the disk/card. It's more of a logical eject: meaning it's safe to remove the card now. You can also do this by right-clicking on the card on your desktop.
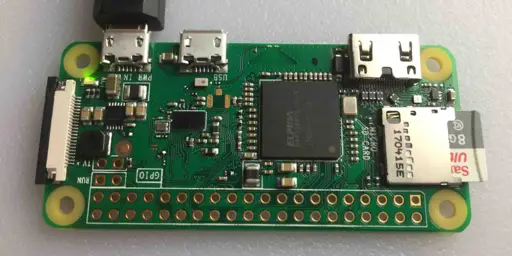
Step 9. Boot the Pi Zero W
- Put the SD card into the Pi Zero W
- Plug a Micro-USB power cable into the power port (the one closest to the end of the board)
- Give the Pi Zero plenty of time to bootup (it can take as much as 90 seconds -- or more)
Step 10. Login over Wifi
This part assumes that ssh is enabled for your image and that the default user is pi with a password of raspberry.
- Open up a terminal window
- Run the following commands:
ssh-keygen -R raspberrypi.local ssh pi@raspberrypi.local - Don't worry if you get a host not found error for the first command - the idea is to clear out any previous references to raspberrypi.local
- If the pi won't respond, press Ctrl-C and try the last command again
- If prompted with a warning just hit enter to accept the default (Yes)
- Type in the password -- by default this is raspberry
Congratulations! You can now access your Pi Zero W over wifi!
If you can't connect, see the troubleshooting section near the end of this article. You may need to make some adjustments for your network.
Step 11. Change your Hostname and Password
Because your pi is now on the network, you should immediately change the hostname and password.
At the command line type:
sudo raspi-config
Select the options for changing the hostname and password. On a new image, I would also recommend expanding the file system (now under the Advanced options). Once the changes are made, reboot.
Remember that once you reboot, you will need to use the new hostname to login over ssh. For example, if your new hostname is mypi you would connect like this:
ssh pi@mypi.local
Step 12. Get the updates
Once connected over WiFi, the next thing you should do is run some updates:
sudo apt-get update -y
sudo apt-get upgrade -y
Troubleshooting
Mac command line issues
Every time I update my Mac I seem to run into new permission issues. If you are having trouble doing simple operations at the command line, see this article:
WiFi issues
If you have trouble connecting over wifi, see my instructions for accessing a Pi Zero over a USB cable: SSH into Pi Zero over USB. Once connected you should be able to fix any issues.
Here are some helpful commands for debugging network and wifi issues on your Pi:
- This command should list your network in the first line for wlan0:
iwconfig - This command should show info for wlan0:
ifconfig - This command should list your network name:
iwlist wlan0 scan | grep ESSID - To edit or review your wifi settings, run this command:
sudo nano /etc/wpa_supplicant/wpa_supplicant.conf
Related articles
Here are some of my related articles:
- How to Backup your Pi
- SSH into Pi Zero over USB
- Setup Pi Zero Wifi
- Raspberry Pi Touchscreen Kiosk Setup
- Raspberry Pi Resource Guide