
Ubuntu Desktop MacBook Air Setup
This article covers recycling an old MacBook Air by installing Ubuntu Desktop.
I assume that your plan is to completely wipe the disk and replace it with Ubuntu Desktop. Setting up a dual-boot is a more complicated subject and beyond the scope of this article.
I'm using a MacBook Air (11-inch, Late 2010) that has been sitting dormant on a shelf for a very long time. It has the following specs:
- Processor: 1.6 GH Intel Core 2 Duo
- Memory: 4GB 1067 MHz DDR3
- Graphics: NVIDIA GeForce 320M 256MB
- SSD: 128 GB
Step 1. Select an Ubuntu Desktop version
While experimenting I discovered the following about various Ubuntu Desktop versions:
- Ubuntu 16.04 by default did not work with the existing graphics card
- If you really need 16.04 you will have to do some digging and learn about tools like GRUB etc. which are beyond the scope of this article
- Ubuntu 18.04 worked just fine
- Ubuntu 20.04 suffered from a slow desktop GUI response - but remember, this is a 10+ year old laptop - I'm sure on a later MacBook it will probably work just fine (when I try it I will let you know)
For that reason I decided to install:
* Ubuntu 18.04.4 LTS (Bionic Beaver)
Step 2. Download the ISO image
- Browse to: https://releases.ubuntu.com/18.04.4/
- In the Desktop image block click 64-bit PC (AMD64) desktop image if installing on a MacBook Air
- The *.ISO image should immediately download through your browser
Step 3. Burn the ISO image to a USB stick or SD card
To burn an image to a USB stick or an SD card you can use balenaEtcher (which some still refer to by it's old name: Etcher).
The older MacBook Air that I have does not have an SD slot. I've tested installing from an SD card plugged into a USB adapter and it worked.
Even though the 18.04 ISO image was about 2GB, I had trouble fitting onto a 2GB stick. You may need to use use a larger 4GB stick or an SD card that is at least 4GB. If you need some 4GB USB sticks, here is one option:
- 4GB USB Flash Drive 5 Pack Thumb Drive Enfain Memory Stick Jump Drives, Black/Blue/White/Red/Green (4 GB, Multicolor 5 Pack)
(Amazon affiliate link)
From this point on I will refer to the USB stick or SD card as simply the "media."
Download Etcher
- Browse to
https://www.balena.io/etcher/ - Download the version for your operating system
- Run the installer
Run Etcher
To run Etcher, plug the media into your machine:
- Select image - browse to the iso file you downloaded from the Ubuntu site
- Select drive - it may find the media automatically
- Click Flash!
If you get an error you may need to erase and format the disk. In that case use the Mac Disk Utility (see instructions), then try again.
After you flash (burn) the image, Finder (Mac) or File Explorer (Windows) may have trouble seeing it. A simple fix is to pull the media out of your computer or laptop and then plug it back in. On a Mac it should appear on the desktop. On Windows it should appear in File Explorer with a name followed by a drive letter.
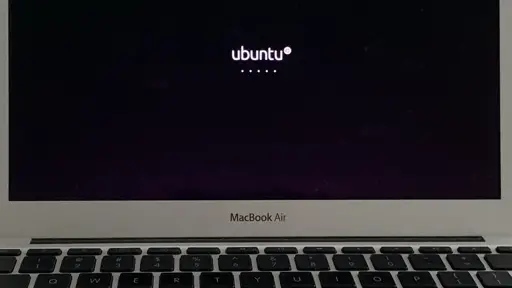
Step 4. Boot from USB
- Plug the media (either the USB stick or the SD card with USB adapter) into the MacBook Air
- Tap the power button to turn the MacBook Air on
- Immediately hold down the alt / option button
- You should keep the button down until the next screen comes up
- You should see one or two gold objects with a USB symbol
- Use Tab or the arrow keys to select the one on the far right
- If you see two, either gold one will work - assuming you have nothing else plugged in
- The trackpad won't be working yet
- Press Enter
- Select Install Ubuntu
- If you wait it may slip into "try out" mode and just load Ubuntu into RAM without you doing anything
- If it does load into RAM you will have to turn off the MacBook and start this step over
Step 5. Walk through the setup routine
This will look very familiar to Ubuntu users who have run an install before.
The trackpad should be working now.
- Select your language (i.e. English) and click Continue
- If your keyboard layout was not selected, click Detect Keyboard Layout
- If you would prefer to use a different layout, manually select it
- Click Continue
- If you are on WiFi select Connect to this network
- Then select your WiFi network and click Connect
- On the dialog that pops up I used the default Wi-Fi Security
- Enter the password for the WiFi network that you want to connect to
- Click Connect
- Click Continue
- Besides the default, I selected the Install third-party ... option
- Click Continue
- It may take a few moments for the next screen to appear
Step 6. Erase the disk and install Ubuntu Desktop
WARNING: This step will erase everything on the drive.
This article assumes that your plan is to completely wipe the disk and replace it with Ubuntu Desktop. Setting up a dual-boot is a more complicated subject and beyond the scope of this article.
- Select Erase disk and install Ubuntu
- Click Install Now
- When you see the Write the changes to disks? dialog click Continue
- For Where are you? select your location and click Continue
Enter user information
For Who are you enter the values:
* Your name - this is just your name
* Your computer's name - some organization have policies on naming conventions
* I just like something short and easy to type and / or remember
* Pick a username - this will be your username used by the system
* Set and confirm your password
* For security reasons I would leave Require my password to login checked
* Click Continue
* Click Restart Now
* Leave the media plugged in to the machine for now or you might get a confusing error
Step 7. Remove the media
If you restarted with the USB stick or SD card still plugged in you will see a message that says Please remove the installation medium.
* Remove the media (USB stick or SD card with USB adapter)
* Hold the power button down until the device goes off
* Turn the device back on
Step 8. Login
- At the login screen, enter your password
- If at this point the desktop loads, you should be in good shape
Troubleshooting
Desktop is blank or flashing
I ran into this when I tried to install 16.04, but it was not a problem for 18.04. If the desktop won't load then you probably have a video driver problem. Fixing that is beyond the scope of this article.
The USB stick or card needs to be formatted
- You may need to run the Mac Disk Utility. See the instructions here.
Getting prompted to split or share the partition
If during the install process you are asked to share the partition then you will need to go into the advanced option in the dialog and manage the partitions.
Look for multiple Ext4 paritions. You should make sure you only have one and set its size to the maximum allowed (enter the size of the SSD and it will default you to whatever is left). If you need to create a new partition, make it an Ext4.
Battery won't hold a charge
Replacing the battery on a MacBook Air is easier than you would think. By replacing the battery you can breathe new life into an old machine. To open the case I recommend this toolset:
It contains special screwdrivers that match the Mac screws (Pentalobe, Torx, etc).
Conclusion
In this article you learned how to:
- Recycle an old MacBook Air
- Install Ubuntu Desktop on a laptop
- Save money by not buying an expensive Ubuntu laptop
A dedicated Ubuntu laptop currently goes for about $1500 USD. Instead, you could buy an old refurbished MacBook Air starting at around $400 USD and replace macOS with Ubuntu. Of course the older it is, the slower it is so it's not a completely fair comparison. But you could also can get a brand new MacBook Air, replace macOS with Ubuntu and still save money. For example:
I prefer converting a MacBook because I'm used to the way their trackpad works. Whenever I have to switch to another brand of laptop for Windows or Linux, I dread having to deal with their trackpads. Though I haven't used all of the latest Ubuntu laptops and wouldn't rule out buying one at some point.
Related Articles
References
- Create a bootable USB stick on macOS [1]