
Raspberry Pi Touchscreen Kiosk Setup (10 Steps, Buster)
This article covers setting up a Raspberry Pi to run a Web app in kiosk mode on a touchscreen or monitor.
Kiosk mode allows you to replace the Raspberry Pi desktop with a stripped down Chromium browser. It will show your Web page or app and nothing more. The user won't even see the address bar. It will look more like an app on a phone or a tablet. If using a touchscreen the user won't even need a mouse.
To test the steps I used a Raspberry Pi 3B+ with a touchscreen. You can also test these steps using a monitor, keyboard and mouse.
If you need a touchscreen that works with a Raspberry Pi 4, see:
Step 1. Setup a lite image
The easiest way to start is to setup a headless Raspberry Pi image. I will show you how to add the GUI components needed on top of it.
Please note that these instructions only work for Raspberry Pi OS Buster and NOT Bullseye.
- Headless Raspberry Pi 3B+ SSH WiFi Setup - for testing I used these instructions, with the latest Raspberry Pi OS (formerly Raspbian) Buster Lite image.
Since I am using a touchscreen, I renamed my host to touchpi. You can use whatever hostname you would like.
Step 2. Login to the pi over ssh
Because my pi is called touchpi, I would login over ssh like this:
ssh pi@touchpi.local
Be sure to adjust the instructions above for the host name that you are using.
Step 3. Configure startup settings
Once you remotely connect to the pi over ssh, run the following command:
sudo raspi-config
From the menu select:
- Boot Options
- > Desktop CLI
- > Console Autologin
- > Desktop CLI
- Advanced Options
- > Overscan
- > No / OK
- > Overscan
Press the tab key twice to get to the Finish option, then press the enter key.
When asked to reboot, select Yes.
If you have a touchscreen or monitor hooked up to the pi, verify that the pi automatically logs in at the command line.
Don't worry if you don't have a keyboard hooked up. You won't need it. All command line operations will be done through the remote ssh login.
Step 4. Reconnect after reboot
On your host computer, you were probably disconnected from the pi when it rebooted.
Remote login again using ssh using your host name.
In my case, again I would run:
ssh pi@touchpi.local
Step 5. Install minimum GUI components
Before you can run the Chromium browser on a lite version of Raspberry Pi OS, you will need a minimum set of GUI (Graphical User Interface) components to support it.
While remotely logged in to the pi, run the following at the command line:
sudo apt-get install --no-install-recommends xserver-xorg x11-xserver-utils xinit openbox
Step 6. Install Chromium Web browser
Once the minimum GUI components are in place, you can install the Chromium browser to display a Web site or Web app.
sudo apt-get install --no-install-recommends chromium-browser
Step 7: Edit Openbox config
The Openbox window manager will be used to launch the Chromium browser.
When Openbox launches at startup it will run two scripts in the /etc/xdg/openbox folder. The first, environment will setup any environment variables, etc. The second, autostart will setup and launch whatever app you specify.
First I will show you how to edit the autostart file and then how to add environment variables to support it.
- Open up autostart in an editor:
sudo nano /etc/xdg/openbox/autostart
Update the autostart file by adding the text below.
- First, add commands to turn off power management, screen blanking and screen saving. We don't want those features in a kiosk.
xset -dpms # turn off display power management system xset s noblank # turn off screen blanking xset s off # turn off screen saver - Next if Chromium crashed it may pop up error messages next time it starts. This is another feature that we don't want in a kiosk.
# Remove exit errors from the config files that could trigger a warning sed -i 's/"exited_cleanly":false/"exited_cleanly":true/' ~/.config/chromium/'Local State' sed -i 's/"exited_cleanly":false/"exited_cleanly":true/; s/"exit_type":"[^"]\+"/"exit_type":"Normal"/' ~/.config/chromium/Default/Preferences - Finally, update autostart to run the Chromium browser in kiosk mode. Pass in an environment variable ($KIOSK_URL) that contains the URL of the Web app to launch.
# Run Chromium in kiosk mode
chromium-browser  --noerrdialogs --disable-infobars --kiosk $KIOSK_URL
To prevent checking for updates, you may also want to add this flag to default that check to once a year (see the Troubleshooting section near the end of this article for details):
--check-for-update-interval=31536000In the next step, I will show you how to set $KIOSK_URL.
- To save the autostart file in nano, press Ctrl-o, hit enter, then press Ctrl-X.
Step 8. Setup the environment
- Edit the Openbox environment file:
sudo nano /etc/xdg/openbox/environment - Add the KIOSK_URL to the file:
export KIOSK_URL=https://desertbot.io
This is so that you can change the URL simply by remote-logging in, editing the environment file and rebooting.
Step 9. Start the X server on boot
- See if ~/.bash_profile already exists:
ls -la ~/.bash_profile - If NOT, then create an empty version:
touch ~/.bash_profile - Edit ~/.bash_profile:
sudo nano ~/.bash_profile - Add this line to start the X server on boot. Because I am using a touch screen I'm passing in the flag to remove the cursor.
[[ -z $DISPLAY && $XDG_VTNR -eq 1 ]] && startx -- -nocursor - Save and exit the file by pressing Ctrl-o, enter, Ctrl-X.
- From the command line run:
source ~/.bash_profile - If you had no errors, reboot
sudo reboot
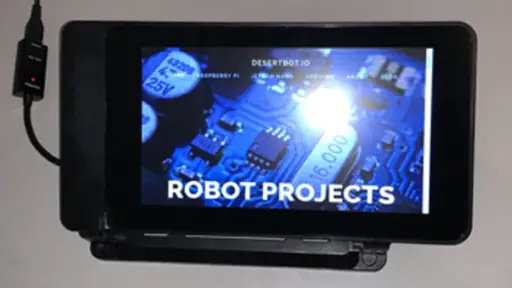
After the server runs through its startup sequence, the browser should be launched and fill the whole screen.
Step 10. Change the URL
To change the URL on the Web site or app that launches, all you need to do is remote login to the pi and edit the Openbox environment file following the steps below:
- Remote login to the pi:
ssh pi@touchpi.local - Edit the Openbox environment file:
sudo nano /etc/xdg/openbox/environment - Change the KIOSK_URL to the URL of your Web app or site
- Then to save the change, press Ctrl-o, enter, Ctrl-X.
- Reboot the pi:
sudo reboot
Troubleshooting
- If nothing comes up, check the URL that you are using.
- If you try running the startx command from a remote login it won't work. You will just display a blank screen on the pi.
- If there is a black border around your browser window, try changing the overscan setting in raspi-config
Chrome browser trying to update
Reader Nicolas R reported issues with Chrome trying to run some updates and popping up a dialog. To resolve that problem he passed in this additional flag:
- This should tell Chrome to only check for updates once a year (1 year = 31536000 seconds):
--check-for-update-interval=31536000
Thanks Nicolas!
Touch screen issues
Not all apps will work in or as expected on a touch screen if they:
* have browser dependencies
* require a keyboard, unless they have an onscreen option
* require mouse functions beyond what a touch screen can emulate
Browser crashes
If the browser crashes often, you can:
* Try to figure out if you can fix the reason it crashes or get an update
* Setup a crontab job to reboot the pi at least once a night
* Use a process manager like pm2 to restart the app when it crashes
* Look into building a hardware reset button (but hide it from kiosk users!)
* Remote login and reboot now and then
Testing a kiosk app on a Mac
How to test a kiosk app on a Mac is a lengthy topic. But here are a few tips if you are developing your own app:
Test screen resolution
On a Mac you can see how a Web app looks on various devices by doing the following:
- Launch Chrome
- Browse to the Web app URL
- Press Option-Command-J to open up the Debug panel (and again to close it)
- While in the Debug console, press Shift-Command-M to toggle a panel where you can test the app on various devices and sizes
- Create your own custom resolution that matches your touch screen
Running Chrome in kiosk mode on a Mac
Just like on a pi, you can run Chrome in kiosk mode on your Mac.
/Applications/Google\ Chrome.app/Contents/MacOS/Google\ Chrome --kiosk --app=https://desertbot.io
After running that you may find Chrome in full screen always leaves out Toolbar and Bookmarks. If that happens, switch them back on in the View menu.
Conclusion
In this article you learned the basics of how to setup a Raspberry Pi to run as a kiosk, either with a monitor or a touch screen.
You could take it to the next level by building more kiosk-centric Web apps, using tools like ReactJS or Electron.
By installing a Web or NodeJS server to run things locally, you could remove the dependency on WiFi or external servers.
To deal with crashes you could add the ability to recover automatically using tools like pm2.
The kiosk itself could be a standalone touch screen app, or integrated into a device like a robot or home automation. It could access hardware through the GPIO pins, Bluetooth, WiFi or the USB ports.
Where to buy
You can buy the touchscreen used in this article by using my affiliate link:
| Part | Vendor |
|---|---|
| Raspberry Pi 7" Touch Screen Display | Amazon |
Raspberry Pi 3B+
If you would like to use the same hardware that I used to test this article, here are my Raspberry Pi 3B+ hardware affiliate links:
| Part | Vendor |
|---|---|
| SmartiPi Touch 1 - Case for The Official Raspberry Pi 7" Touchscreen Display - Adjustable Angle (does NOT work with Raspberry Pi 4) | Amazon |
| Element14 Raspberry Pi 3 B+ Motherboard | Amazon |
| CanaKit 2.5A Raspberry Pi 3 B+ Power Supply with CanaKit PiSwitch | Amazon |
Related articles
Here are some links to other articles I wrote related to setting up a kiosk. Be sure to check them out:
- Raspberry Pi 4 Touchscreen Kiosk Setup
- How to Run NodeJS on a Headless Raspberry Pi
- Raspberry Pi Resource Guide