

How to Stream the PiCamera to your Browser
When I received my Raspberry Pi NoIR Camera I wanted to try it out on a headless Pi 3. The problem is that the camera doesn't display anything when you connect over VNC or Remote Desktop. Sure I could have hooked up a monitor, keyboard and mouse. But how is that going to help me when I want to build something like a wireless crittercam? Fortunately it turns out that there are open source solutions out there for streaming over wireless.
Introducing mjpeg-streamer
There's a project out on SourceForge called mjpg-streamer originally created by Tom Stöveken and located here:
https://sourceforge.net/projects/mjpg-streamer
The code was forked to create a new project for working with the Raspberry Pi here:
https://github.com/jacksonliam/mjpg-streamer
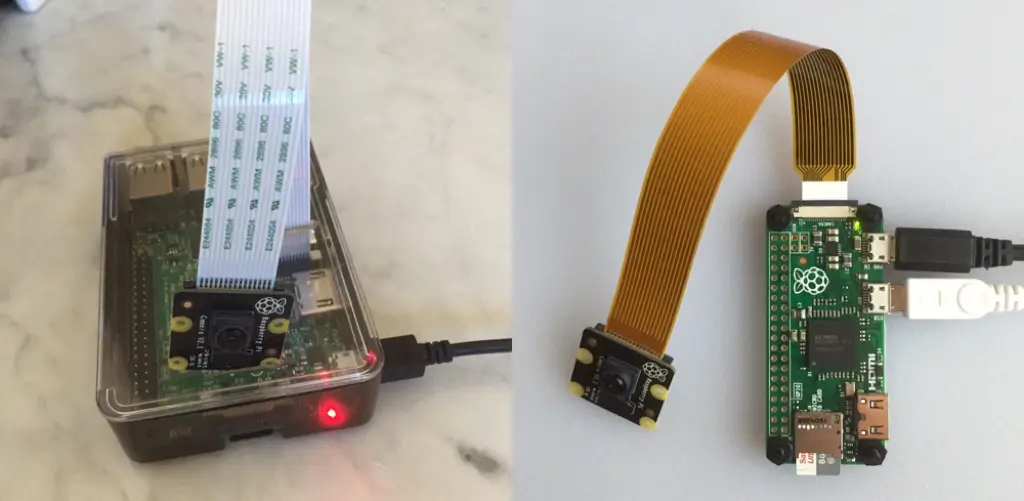
That's what I used to stream from both a Pi 3 and a Pi Zero to a browser (Chrome) running on my Mac.
I would recommend going through the documentation for both sources to get a better background of the project. It will also give you ideas for tweaking the many options. I'm only going to show two ways to connect.
Prequisites
Here is a summary of what you will need, followed by more details:
- Pi Camera -- I only had the NoIR (No Infrared) version to test with
- Pi Zero 1.3 or Raspberry Pi -- for the regular Pi, I only tested with a 3
- Network connection -- I connected wirelessly to both devices
Pi Camera
I tested this using the Pi NoIR Camera V2. It most likely works with the regular camera. It's called the NoIR because it has no Infrared Filter. Coupled with an infrared light source you can use it to see things in the dark. It also works in regular light. But the colors may be off. You can experiment by pointing an infrared remote at something.
Pi Zero Requirements
You must have a Pi Zero version 1.3 or later. It is the earliest version with a camera connector. You will also need a special ribbon for the Pi Zero. The one that comes with the camera will only fit the other Pi models.
Raspberry Pi Requirements
I only had a Raspberry Pi 3 to experiment with. I don't know how this will work on other models. The NoIR is supposed to work with Pi models 1, 2 and 3. But I don't know about the software.
Operating System
The Pi Zero 1.3 had Raspbian Jessie Lite installed. The Pi 3 was running the regular version of Jessie.
Wireless Operation
I tested this over wireless with both devices. For the Pi 3 I used the built in adapter. For the Pi Zero I used a wireless adapter attached to the micro-USB port.
I noticed at least on the Pi Zero it needed a moment to connect. At first I would get an error that the browser can't find the host. But soon it would refresh and I would see the Web page.
Browser
I tested this using Chrome on a Mac.
Steps Outline
Here is an outline of the steps required. They will be covered in more detail in the next section:
- Login to your Pi (I did this over ssh)
- Update the operating system
- Enable the camera
- Create a project folder
- Download mjpg-streamer
- Compile mjpg-streamer (Don't panic! I'll walk your through it.)
- Set an environment variable
- Run mjpg-streamer passing in desired settings
- On a computer attached to the same network, browse to the device and view the stream
Detailed Steps
Step 1: Login to your Pi
Replace HOSTNAME with the hostname of your Pi.
$ ssh pi@HOSTNAME.local
Step 2: Update the Operating System
$ sudo apt-get update
Step 3: Enable the camera
Launch raspi-config:
$ sudo raspi-config
From the menu options:
- Select: 6. Enable Camera
- Click: Yes
- Click: OK
- Click: Finish
Step 4: Create a Project Folder
$ mkdir projects
$ cd projects/
Step 5: Download mjpg-streamer
To download the project you will need a source control system called git. It may not be installed on a fresh image. I know it's not on the lite image. So you may need to install it. Not sure? Type git, hit return and see what happens.
$ sudo apt-get install git
Now that you have git installed, use it to clone a copy of the mjpg-streamer to your Pi.
$ git clone https://github.com/jacksonliam/mjpg-streamer.git
If you aren't familiar with it, git is a very handy tool used by most developers. When I start discussing code I will likely mention git a lot. Most people start with the free online book: Pro Git.
Step 6: Compile mjpg-streamer
If you aren't familiar with compilers, don't panic. Just follow these steps and hopefully you won't see any errors in the output.
$ cd mjpg-streamer/
$ cd mjpg-streamer-experimental/
$ sudo apt-get install cmake
$ sudo apt-get install python-imaging
$ sudo apt-get install libjpeg-dev
$ make CMAKE_BUILD_TYPE=Debug
$ sudo make install
Step 7: Set an Environment Variable
This is so the program can know where to find the libraries that it needs. You will always need to run this first or you can learn how to make the setting permanent. That's beyond the scope of this article. Don't forget the period ('.') at the end of the command.
$ export LD_LIBRARY_PATH=.
Step 8: Run mjpg-streamer
$ ./mjpg_streamer -o "output_http.so -w ./www" -i "input_raspicam.so"
Note that this worked fine on the Pi Zero. But on the Pi 3 the image was reversed and I had to add the -hf flag:
$ ./mjpg_streamer -o "output_http.so -w ./www" -i "input_raspicam.so -hf"
Step 9: Browse to the Pi from Another Computer
On another machine (like a Mac using Chrome) browse to (replacing HOSTNAME with your Pi hostname):
http://HOSTNAME.local:8080
NOTE: If you get a page error, wait a minute and see if it refreshes.
Click on the Stream tab on the left to see the image.
Or:
http://HOSTNAME.local:8080/?action=stream
If the image is backwards, see my note above about the -hf flag.
You can also try:
$ ./mjpg_streamer -o "output_http.so -w ./www" -i "input_raspicam.so -x 1280 -y 720 -fps 15 -ex night"
Or if it's backwards, add the -hf flag:
$ ./mjpg_streamer -o "output_http.so -w ./www" -i "input_raspicam.so -x 1280 -y 720 -fps 15 -ex night -hf"
To stop it from running: place your focus in the terminal window and press Ctr-C.
Additional Settings
Review the documentation for more info on settings.